Press "Enter" to skip to content

Category: electronics

How I Actually Play Video Games With SMA: The Tools I Use Every Day

Man using a power wheelchair with chin control in a park
Independent outdoor mobility using a chin-controlled power wheelchair.

My name is Andrei Cebotar. I’m 37, I live in Moldova, and I have Spinal Muscular Atrophy.

My hands get tired fast — by the end of the day I often can’t feel them at all. I can press one mouse button. That’s mostly what I have to work with. And yet I play games, I write, I have conversations online. This is how.

This isn’t a neutral roundup. These are the tools I use to access my computer and play games. Some of them are part of my daily routine, others I tried and eventually stopped using. What works for me may not work for everyone, but this is the setup I’ve built around my own needs.


PlayAbility — my face is my controller

PlayAbility is a free Windows app that maps facial expressions and head movements to any game input. You set it up through a webcam — no extra hardware. And it works with any PC game that accepts a standard controller or keyboard.

Here’s what my setup actually looks like in practice: I raise both eyebrows — my character jumps. I raise my left cheek — I drink a potion. I raise my right cheek — I activate a specific skill. These are real mappings I use in real games, right now.

What makes this work is that the gestures feel natural after a while. You stop thinking “raise left cheek” and just do it. The response is fast enough that it doesn’t break the flow of gameplay. And because it creates a virtual Xbox controller in the background, the game has no idea you’re not using a standard input — no mods, no special settings needed.

It also works outside of games. You can map expressions to mouse clicks, scrolling, keyboard shortcuts. For someone with one working mouse button, that’s not a small thing.

PlayAbility is free. There’s a paid Pro version if you want unlimited profiles, but everything works without paying.


Handy — I speak, it types

Handy is a free, open-source speech-to-text app. You press a shortcut, speak, release — and your words appear in whatever text field your cursor is in. Any app, any website, anywhere on your computer.

I use it every single day. It has genuinely changed how I communicate. Typing is physically expensive for me — Handy removes that cost almost entirely for text. Messages, emails, search boxes — I speak instead of type.

What sets it apart from Windows Voice Access or cloud dictation tools is that it processes audio locally. Your voice never leaves your computer. It’s also simpler — one job, done well. Press, speak, done.

I used Windows Voice Access before Handy. It helped, but the accuracy wasn’t great. Handy is noticeably more reliable, and the local processing means it works without an internet connection.


Xbox Adaptive Controller — the foundation I build on

For a long time I didn’t use a standard keyboard at all. Instead I used the Razer Tartarus — a one-handed keypad with a stick and programmable buttons. It let me build exactly the macros I needed without reaching across a full keyboard. For someone with limited hand mobility, the compact layout and low-force buttons make a real difference.

More recently I moved to the Xbox Adaptive Controller, and it’s more flexible. It’s not a controller by itself — this is important to understand before you buy it. It’s a hub: a large flat surface with two big buttons and a row of 3.5mm ports on the back, each of which accepts an external switch, joystick, or pedal. You build the layout around your body, not the other way around.

I use it with a joystick and switch buttons. The physical switches require very little force — that matters when your hands tire quickly.

It works on PC and Xbox. If you’re on PlayStation, Sony has their own equivalent — the PlayStation Access Controller, which works on the same principle.

The Logitech Adaptive Gaming Kit is worth knowing about too — it’s a set of buttons, triggers, and switches designed to plug into the Xbox Adaptive Controller. It gives you more options without spending a lot.


Tobii Eye Tracker — useful, but I stopped using it

The Tobii Eye Tracker 5 sits below your monitor and tracks where you’re looking. In games, it moves the camera in the direction of your gaze. I used it to play Kingdom Come: Deliverance — wherever I looked, the camera followed. For an open-world RPG, that’s genuinely immersive and reduces the need to constantly move a stick just to look around.

The problem for me was physical. After extended sessions, my eyes hurt — the infrared tracking seemed to cause strain over time. I eventually stopped using it for that reason.

One thing worth knowing: Tobii’s native game integration moves the camera, but it doesn’t control your mouse cursor by default. For that you need a separate app called Project IRIS. It lets you control the mouse pointer with your gaze and set up interaction zones on your desktop — areas you look at to trigger actions like clicks or keypresses. It costs €39 and works with Tobii EyeX, 4C, and Eye Tracker 5. If you want to use eye tracking beyond games — for navigating Windows, browsing, anything — IRIS is what makes that possible.

If eye strain isn’t an issue for you, it’s worth trying. Eyeware Beam is a software alternative that uses a regular webcam or iPhone instead of dedicated hardware — cheaper, slightly less precise, but no infrared involved.


Talon Voice — powerful, but not for me

I also tried Talon Voice. It’s a free, highly capable hands-free input system — voice control, noise recognition, eye tracking, all combined. You can theoretically control your entire computer without touching anything: move the mouse, click, type, run scripts, even code.

The problem for me was false positives. Too many unintended triggers — the system would pick up ambient sounds or normal speech and fire commands I didn’t mean to send. Managing that became more work than the tool was saving me. I moved on.

That said, Talon has a large and active community, and people who invest time in configuring it properly seem to get a lot out of it. It’s also worth noting that it has a significant learning curve — the setup is technical, and it’s not a plug-and-play experience. If you’re comfortable tinkering, it might be worth exploring. If you want something that works quickly without deep configuration, Handy is a much simpler starting point for dictation.


The combination is the point

None of these tools solves everything on its own. What actually works is layering them. Right now, on a typical day, I’m using PlayAbility for in-game actions, Handy for any text I need to write, and the Xbox Adaptive Controller for movement. Each covers what the others can’t.

If you have SMA, cerebral palsy, muscular dystrophy, or any condition that limits fine motor control — the starting point I’d suggest is PlayAbility and Handy. Both are free, both require nothing beyond a webcam and microphone, and both can meaningfully change what’s possible at a computer, not just in games.

The hardware — adaptive controllers, eye trackers — comes later, once you know what gaps remain.


In a follow-up piece, I write about where I think this is all heading — specifically, EMG wristbands and what they could mean for people like me. But that’s the future. This is what works right now.

1 Comment
The Battery Dilemma: From Lead-Acid to Lithium in Power Wheelchairs

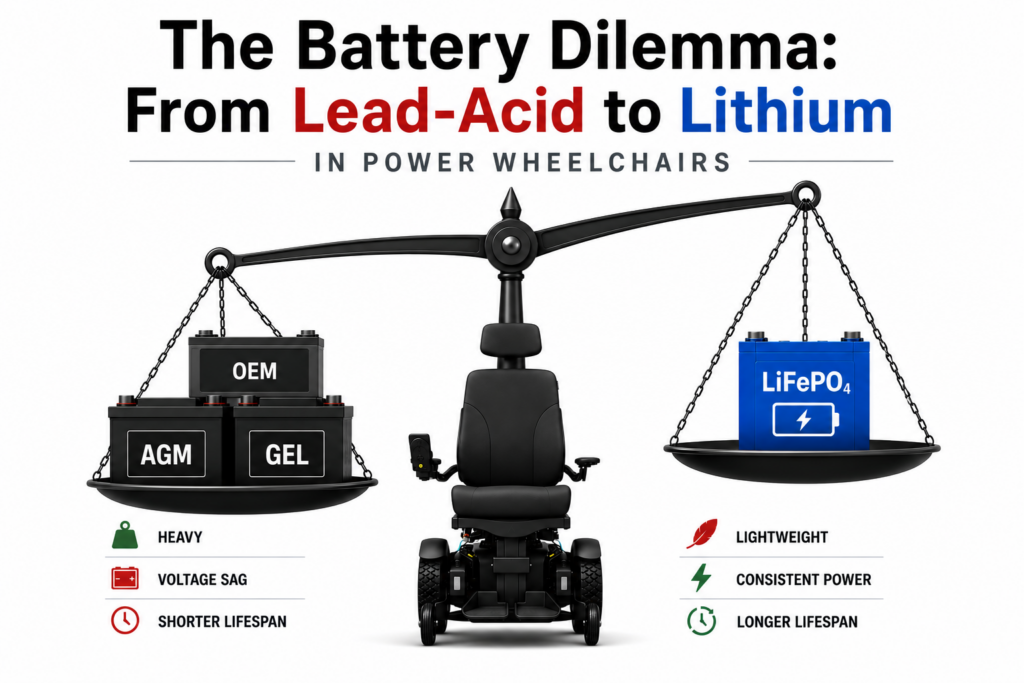
Minimalist infographic comparing AGM, GEL, OEM, and LiFePO4 wheelchair batteries using a balance scale and a power wheelchair
Minimalist infographic comparing traditional lead-acid wheelchair batteries with modern LiFePO4 lithium battery technology for power wheelchairs.

Choosing the right battery fundamentally changes the experience of using a power wheelchair. As the grassroots assistive tech community pushes for the Right to Repair and hardware independence, the shift from traditional lead-acid to custom lithium builds has become a topic of great interest. Most power wheelchairs operate on 24V systems, typically using two 12V batteries connected in series.

Why I Started Researching LiFePO4 Batteries

Last August I bought a used Permobil F5. The original lead-acid batteries were in very poor condition — they could barely move the chair for a few meters inside the house. Around the same time, several people I know had already switched to lithium. One of them had been running LiFePO4 for over four years, while another had installed it just a few months earlier. Both kept telling me the same thing: with a proper lithium setup, you can often charge the battery only once a week, or even once every two weeks, if you mostly use the chair indoors.

This information really motivated me. I started researching whether it was possible to install a LiFePO4 battery in a Permobil F5. It turned out that quite a few people had already done this conversion successfully. I even spoke on a forum with someone from the United Kingdom who had built his own lithium pack for the same model. He described the dramatically increased range he now gets on a single charge. He also powers his non-invasive ventilator directly from the same battery. In his build he used eight EVE 160Ah cells — this specific size was chosen because the battery compartment in the Permobil F5 has very limited height, so larger cells simply wouldn’t fit.

Most LiFePO4 users I’ve spoken with feel the same way — they believe lithium is the future. They all say that the downsides are more than offset by the freedom it provides. Being able to travel 25–35 miles on a single charge without having to charge the chair every day, and without constantly worrying about damaging the battery, makes a real difference in everyday life.

To better understand why lithium makes such a big difference compared to traditional batteries, let’s first look at the main battery types used in power wheelchairs today.

Common Battery Sizes and Typical Range in Power Wheelchairs

Most power wheelchairs use two 12V batteries connected in series to create a 24V system. Batteries come in several standard physical sizes (called “group sizes”). The most common ones are:

  • U1 (Group 22NF): Usually 30–55 Ah. Common in lighter and more portable wheelchairs.
  • Group 24: Typically 60–85 Ah. One of the most widely used sizes for standard adult power wheelchairs.
  • Group 27: Often 80–110 Ah. Used in heavier-duty and bariatric chairs.
  • Group 34: Less common, but found in some larger models.

Important note on usable capacity: With traditional AGM and GEL batteries, it is generally not recommended to discharge them below 50% if you want to maintain a reasonable lifespan. This means that from a 74Ah AGM or GEL battery you can realistically use only about 35–37Ah. LiFePO4 batteries can safely deliver 80–100% of their rated capacity, so a 74Ah LiFePO4 pack can provide roughly 60–74Ah of usable energy.

Real-world range depends on the user’s weight, terrain, speed, temperature, and driving style. As a general guideline:

  • Good quality AGM or GEL batteries usually deliver 10–18 miles (16–29 km) of range.
  • Well-built custom LiFePO4 packs typically achieve 18–32 miles (29–51 km) in real conditions, with some users reaching 35–40 miles under ideal circumstances.
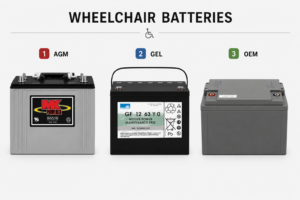
Comparison chart showing AGM, GEL, and OEM wheelchair batteries on a clean white background
Visual comparison of AGM, GEL, and OEM batteries commonly used in power wheelchairs and mobility devices.

Comparing the Main Battery Types

AGM (Absorbent Glass Mat) Batteries

This is the most common type. The electrolyte is absorbed in fiberglass mats. Popular examples include MK Battery in U1 and Group 24 sizes.

Pros: Good burst power, relatively low cost, provides natural ballast for stability.
Cons: Significant voltage sag when discharging, short lifespan (1–1.5 years), sensitive to deep discharge.

GEL Batteries

Similar to AGM but with the electrolyte in silica gel. Often positioned as a premium lead-acid option (examples: MK Battery GEL, Sonnenschein).

Pros: Better cycle life than AGM, slightly more tolerant to deep discharge.
Cons: Very sensitive to charging voltage, poor cold weather performance, higher price.

OEM (Factory Branded) Batteries

Batteries sold by wheelchair manufacturers (Permobil, Pride Mobility, Invacare etc.). In most cases these are rebranded AGM or GEL batteries.

Pros: Perfect physical fit, usually maintains warranty.
Cons: Significantly more expensive (“brand tax”), sometimes include software locks (DRM).

Blue LiFePO4 prismatic battery cells arranged in a multi-cell battery pack configuration
LiFePO4 prismatic cells commonly used in custom lithium battery builds for power wheelchairs and mobility systems.

The Lithium Upgrade (LiFePO4)

Lithium Iron Phosphate (LiFePO4 or LFP) is one of the safest and most practical lithium battery chemistries available today. Unlike conventional lithium-ion batteries (such as NMC or NCA), LiFePO4 uses iron phosphate as the cathode material. This makes it significantly more thermally stable and much less prone to thermal runaway (fire or explosion) even if the battery is damaged, overcharged, or short-circuited.

Because of its safety characteristics and long cycle life, LiFePO4 has become the preferred chemistry for custom power wheelchair builds and is increasingly being offered as a factory option by some manufacturers (for example, Ottobock on the Juvo series and Pride Mobility on the Jazzy EVO 613Li).

What is a BMS?
BMS stands for Battery Management System. It is the electronic “brain” of a lithium battery. It constantly monitors voltage, temperature and current, protects the battery from overcharging, deep discharging, overheating and short circuits, and balances the individual cells so they work evenly. A good BMS is essential — without it a lithium battery can be damaged or become unsafe.

How a LiFePO4 battery is built

A typical 24V LiFePO4 battery for a power wheelchair consists of 8 prismatic cells connected in series (each cell has a nominal voltage of 3.2V). High-quality cells from manufacturers such as EVE or CATL are most commonly used. These cells are connected to a BMS, thick power cables, appropriate fuses or circuit breakers, and are securely mounted in the battery compartment.

Pros:

  • Comparable upfront cost with much better long-term economics: A quality LiFePO4 build with a good BMS usually costs about the same as a pair of premium GEL batteries, but lasts significantly longer (often 5–10 years).
  • Radical weight reduction: A well-built 24V LiFePO4 pack typically weighs 25–35 lbs (12–16 kg) instead of ~100 lbs (45 kg) for a lead-acid pair.
  • Flat power curve: The wheelchair maintains strong and consistent performance even at lower states of charge — there is almost no voltage sag.
  • Much higher usable capacity: You can safely use 80–100% of the rated capacity, compared to only ~50% with AGM/GEL batteries.

Cons:

  • Requires proper assembly: Needs correct calculations, heavy-gauge wiring, quality circuit breakers (100A+), proper fusing and good insulation.
  • Dedicated charger required: Standard lead-acid chargers will damage the BMS and cells. A lithium-specific charger is mandatory.
  • No gradual warning: Because there is almost no voltage sag, you get very little advance notice before the BMS cuts power.
  • Air travel restrictions: Lithium batteries are subject to strict IATA and airline regulations. Many carriers require advance notice, battery removal or special packaging.

The Problem with Off-the-Shelf Lithium Batteries

Buying cheap ready-made 12V LiFePO4 batteries (sold for RVs or solar, such as generic “100Ah RV batteries”) is a common mistake. Most budget batteries have weak BMS boards (often limited to 30–50A continuous discharge). Power wheelchair motors create very high current spikes on startup. A weak BMS interprets these spikes as a short circuit and instantly cuts power — leaving you stranded.

Commercially available batteries with sufficiently strong BMS boards are very expensive and often too large for standard wheelchair trays. For most users, a properly engineered custom build remains the only practical solution.

Important Safety and Usage Notes for LiFePO4 Builds

  • Check your current draw: Before choosing a BMS, determine the continuous and peak current consumption of your wheelchair’s motor controller. Many controllers can briefly pull 80–150A or more during acceleration and hill climbing. Select a BMS and circuit breakers with adequate headroom.
  • Discharge limit: Never discharge below 20–25% remaining capacity. Always keep a safety buffer — the BMS will cut power abruptly with no gradual slowdown.
  • Quality BMS: Use a BMS with over-current, short-circuit, temperature and cell-balancing protection.
  • Fusing: Always install appropriate circuit breakers or fuses (100A+ class recommended).
  • Secure mounting: The battery must be firmly fixed — wheelchairs experience significant vibration.
  • Professional help if needed: Improper assembly can damage the motor controller or create a fire hazard. If you lack experience with high-current DC systems, work with a knowledgeable technician.

The Hidden Trap of Losing Weight: Center of Gravity and Traction

One of the biggest advantages of a custom LiFePO4 build is the dramatic weight reduction. However, removing 60–80 lbs (27–36 kg) from the base changes the wheelchair’s physics:

  • Loss of traction: Drive wheels need downward pressure. Without the original ballast the chair can spin its wheels on smooth ramps or wet surfaces.
  • Higher center of gravity: This increases the risk of tipping, especially during quick acceleration or on slopes. Many users add bolt-on counterweights or adjust seat positioning to restore stability.

Conclusion: Making the Right Choice

Switching batteries is not just a component swap — it changes how your wheelchair feels and behaves.

If you want maximum simplicity and minimum hassle, high-quality AGM batteries (such as MK Battery) or premium GEL options remain the most straightforward traditional choice.

However, if you want to eliminate voltage sag, significantly reduce weight, increase range, and are willing to invest time or professional help into a proper build, a well-engineered custom LiFePO4 pack using quality cells (EVE, CATL, etc.) is usually the best long-term investment. The key is to approach the project responsibly — never compromise on BMS quality, always use proper fusing, respect the new physical dynamics of a lighter chair, and leave a safety buffer on every charge.

This article is for informational purposes only. Modifying batteries may affect warranty, safety certifications, and medical device compliance. Always consult with your wheelchair provider or a qualified technician before making any changes.

Leave a Comment

Building simple switches

In the material we are scanning from Alexandra Enders’ collection of DIY assistive tech information, we have come across several great sources for learning the basics of electronics in order to make switches, buzzers, and other small gadgets, very useful for people with limited dexterity to control other devices.

I really like these short, practical guides. Rather than having to wade through a college textbook level guide to electronics, you get just the basics you need to build very cheap and easy gadgets.

Today’s scan is simply called “Introduction to Electric Circuits”, written in 1981 by Hugh O’Neill from the Rehabilitation Engineering Center at Stanford.

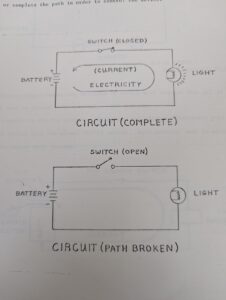
He explains what a circuit is – an unbroken path from one terminal to another of a power source, through which current can flow. A good overview of circuits in series and parallel comes next, including the tip that most simple toy adapters the AT maker will build, will be in series.

Types of switches covered are toggle, rocker, push button, microswitch, rotary, and mercury (tilt) switches.

It’s a very condensed electronics course in about 15 pages! If you walk through it and try the instructions, you will learn enough about how batteries, switches, circuits, and so on work that you can build many adaptive devices.

Have a look: https://archive.org/details/introduction-electric-circuits

a diagram showing a complete and a broken circuit

Leave a Comment