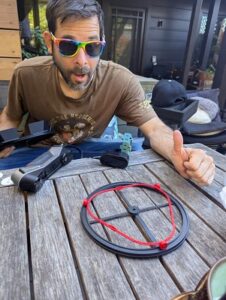
Recently, I showed up to the Easy Does It office along with Judi Rogers. I was looking for collaborators on a project with my organization, Grassroots Open Assistive Tech. And while I knew a little about EDI Executive Director Bruce Curtis’s, work and activism, I had never met him in person before.
“You might be wondering, why this particular guy in Moldova and his wheelchair…” I said diffidently to Bruce to kick off our meeting, figuring I would have to explain and justify this project.
“Doesn’t matter.“ Bruce said. “We don’t care! You’re talking with him. He needs the help. Let’s do it.”
Oh, my god! What a badass, and a kindred spirit. My friend Judi was laughing as she saw my delight at this 100% no bullshit attitude. This is something I deeply believe in as an activist: that we are here to do the work in front of us, whatever comes our way.
I’d like to tell a little of this story, and how we are working to get Andrei rolling and outside again!
Earlier this fall, I saw a Reddit post from a guy in Moldova, Andrei, who has a used, refurbished Permobil F5 powerchair. He was looking for low cost or DIY possibilities to help him change the joystick that controls his chair. I was impressed by his clear description of the situation, and his willingness to dive into whatever it would take technically to do this project.
On a power chair, with a default setup, you need to be able to push the joystick half an inch or so in every direction to control the chair’s motion and speed. Andrei, who has SMA, a progressive neuromuscular condition, recently lost much of the strength and mobility in his hand, and is not able to drive his chair at all.
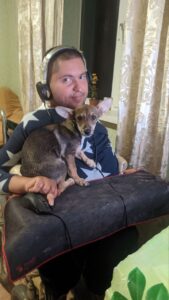
With a micro joystick, controllable by very small movements of even one finger or thumb — like the control on some laptop keyboards – Andrei could leave the house again, walk his dog Bobby, and enjoy the outdoors.
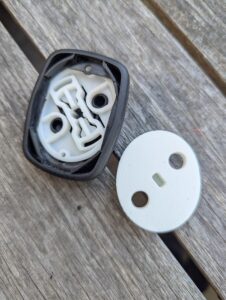
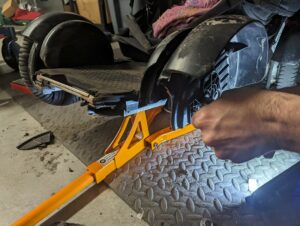
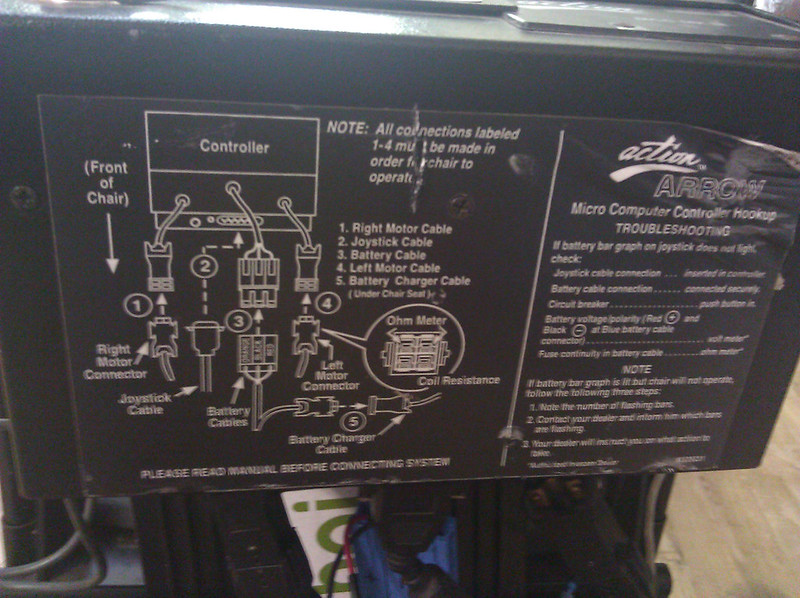
However, changing the method for driving the chair requires the ability to reprogram the motor controller. Wheelchair manufacturers consider this proprietary technology, and only give out the tools and codes to reprogram a chair to their authorized vendors and their repair techs. The vendors and repair techs will only work on chairs that they sold you. This is part of why there is a legal battle all over the United States at the state and federal level for the Right to Repair.
A complex powerchair of the kind Andrei needs can easily cost 20 or 30 thousand dollars. This is part of why many disabled people are using donated, or secondhand market, chairs. When we need to modify these chairs to meet our changing needs, or fix them when they break, we are blocked by the proprietary tech and the limits on who is considered an “authorized repair person”. It is a familiar story to anyone with a complex wheelchair.
Added to these issues, Andrei is in Moldova, where occupational therapy and mobility tech are not easily available.
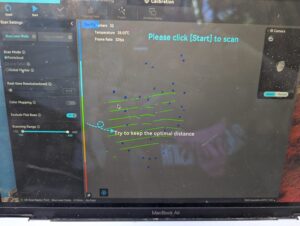
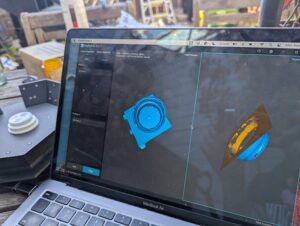
It became clear that Andrei needed more than a new joystick or a head or chin control. He needed consultation with expert advisors to figure out some options that might work, then, potentially help to reprogram his motor controller to work with those new parts, and help installing them.
Olga, Ian, and I, from GOAT, approached this problem by pulling together a coalition team to talk with Andrei. I asked Judi Rogers, Chair of the Board of the Center for Independent Living in Berkeley, for a recommendation of an occupational therapist specializing in seating and mobility who might talk with Andrei over video chat. She immediately volunteered to do it herself! We had a productive call with Andrei and Maria, helped out by translation by Olga and Levan, who both speak Russian.
Later, Bruce Curtis, Levan, and Rose from Easy Does It Emergency Services joined us along with Vincent Lopez from ILRCSF. We got Andrei and Maria to record a video of how Andrei transfers with his lift and have been able to improve his seating setup already. Rose who has the same condition as Andrei was able to give him a lot of advice and had great ideas for further support, and is working to get Andrei talking with Genentech about new medications and “compassionate use” free programs. We also have been chatting with Morgan Kanninen and John Benson from the CIL assistive tech and repair team for advice — and the CIL has kindly let us scout their warehouse for parts.
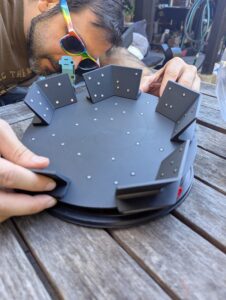
Now, we have a list of equipment that Levan and Vince are assembling and testing, and are making a plan to fly it out (along with a repair tech from GOAT!) to Andrei. Some of this equipment is scavenged, and some we will need to buy either used or new.
Some of the equipment we are assembling and testing:
– chin control for driving the chair
– micro joystick as a second option for a controller
– “attendant controls” for the back of the chair
– various swing-away mounting arms for the controllers
– cough assist vest, nebulizer, bipap (he will need to find medical help for it, but we could get him the equipment)
– variety of foam for seating and positioning
– tools for wheelchair maintenance
Together, we are creating a plan to get Andrei moving and independent.
We would like to ask your help to fund this plan!!!
Please donate today to GOAT! If you can donate through a corporate matching program, like Benevity, or Cybergrants/Front Door, that helps to increase the amount. We need to cover the expenses and plane fare for our traveling wheelchair repair tech as well as the equipment we can’t get for free.
We’re looking for funds right now, for this specific project, to get Andrei rolling as soon as possible.
But we also would love any extra support for our various organizations:
GOAT – https://www.openassistivetech.org/donations/
Easy Does It – https://easydoesitservices.org/
Center for Independent Living – https://thecil.org/donate/
Independent Living Resource Center San Francisco – https://www.ilrcsf.org/
These organizations are led by disabled people and were founded by disabled leadership and they all do great work. They grew from the powerful uprising of the disability rights movement in the 1970s in Berkeley, Oakland, and San Francisco. They are not run by religious organizations, or by the local, state, or federal government though they may get government grants. But these are fundamentally progressive activist organizations that are rooted in disabled community. That is very important to the work that they do! And they need community support.

About working with Andrei, and conditions in Moldova
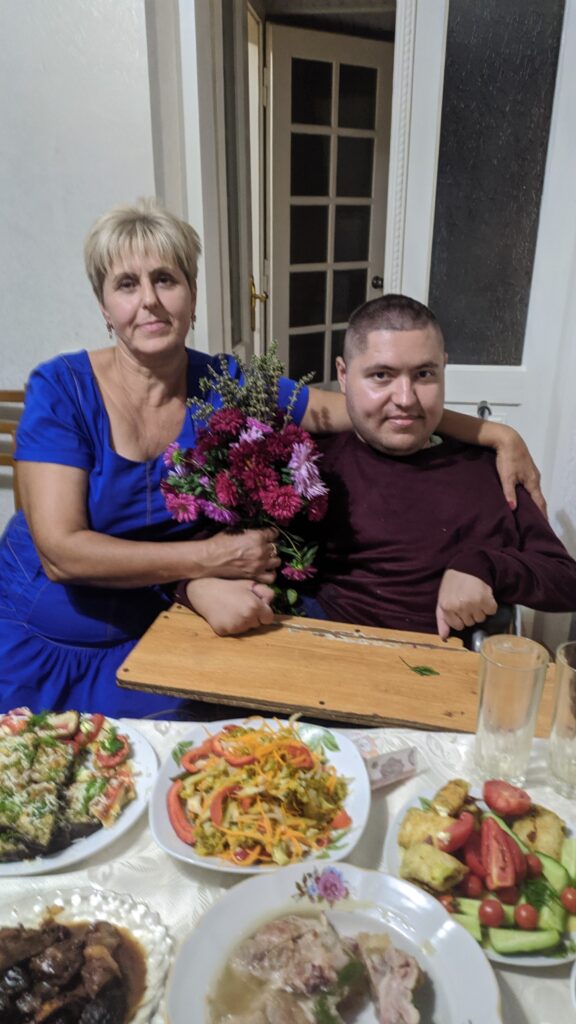
It has been good just getting to know Andrei and his mother. I have deep respect for them both. Andrei is engaging, a good writer and clear communicator, impressing me as smart and powerful, knowledgeable and determined. He is a bit blown away by knowing that half the people on this motley crew are fellow wheelchair users. We keep throwing links at him – watch Crip Camp! Here’s an article about disability rights! And as, stuck in his home without independent movement, he spends a lot of time online , he has now watched and read even more widely.
The only person who will help Andrei, for even the smallest tasks, is his mother Maria. And no one is helping her. This is not a community where your neighbor comes over to bring you a pie or lend you a screwdriver, much less a place to expect any sort of consideration for disability rights or justice, or a thought to care or even survival.
I had a little superficial knowledge of what disabled people faced in the former USSR, from reading Rúben Gallego’s memoir, White on Black, of growing up with cerebral palsy in rather horrible institutions. When Andrei told me a bit more about his life and his history of his family, I realized it was about a million times more challenging than I had imagined. Crushing poverty and the indifference of those around him meant that he and his late sister, who also had SMA, were prisoners in their own home and lucky to have a home at all. These are the conditions for his struggle for survival, for connection, education, contributing to society, and for happiness.
I want to let you read his story in his own words.
Andrei’s story
I was born in 1988, back in the Soviet Union, in the city of Lipcani. I was quite an active child. According to my mother, I loved to climb onto a chair and then onto the table. A couple of times, I got into trouble with teacups I encountered along the way, and I broke them. The first signs that something was wrong began at about one year and three months. I could crawl and stand on my feet, but I wasn’t able to take my first step. I crawled a lot and could only stand by holding on to something.
We visited many doctors in Moldova and Ukraine. At first, before I was two, I was diagnosed with flat feet. Then we visited a genetic institute in Kyiv, and I was diagnosed with Duchenne muscular dystrophy. My parents wanted more children, and doctors in Kyiv convinced them that if they had a girl, she would be completely healthy, so they took the risk again. And in 1994, my sister Ekaterina was born. At first, our joy knew no bounds. I really wanted to have a little sister, but at about seven months, my mother realized that she was starting to weaken. She couldn’t stand without help and got tired very quickly, but this was somewhat compensated for by her incredible cheerfulness and natural energy.
It was a difficult time. We had no electricity for several years, or if it came on, it was only for a couple of hours at night. There was no work. My father was unemployed, so my parents turned to farming to survive. We bought a cow and took five plots of land for vegetable gardens. But soon my father left for work in Kazakhstan, and then a year later, to Russia. My mother single-handedly cultivated all this land and looked after the cow.
As the eldest, I babysat my sister, rocking her when she was little, helping her get up when she fell. My father earned some seasonal work in Russia, and my mother looked after us here alone. It was incredibly difficult for her; society persecuted her for us being sick; people in their ignorance thought it was her fault. We were children who just wanted to go for walks, just to get out of the house, but it often happened that my mother could only take one wheelchair with her to take one of us for a walk. One day, she took us both and pushed one wheelchair about 20 meters, then the other. But I stayed home more and more often because my mother couldn’t keep up. She sold milk from our cow, and together with Katya, they delivered it for many years.
For a long time, we didn’t have our own place and lived with my grandfather, my father’s father. He loved strong drinks and smoking, and often kicked us out. In 2001, we bought a small house on a slope. While my grandfather’s house was on level ground, and I could navigate the yard in my wheelchair, albeit with difficulty, our new house had a steep slope. This move was a minor tragedy for me: I couldn’t do anything outside the house anymore, and because of the slope, I flipped over in my wheelchair several times.
At about 13, all my friends disappeared, they became ashamed to play with me, I became a recluse, immersed myself in studying, my sister and I were homeschooled, I liked studying, my favorite subjects were history and biology, and partially math until the 8th grade, until they changed my teachers, the new teacher knew nothing about it. I finished 9 years of high school, and I was faced with the fact that if I wanted to continue studying, I had to attend school in person, there was no one to take me there every morning and that was the end of my education.
Around 2005, they bought me my first computer, it was an Intel 386, it often broke down, my sister and I usually made schedules for each of us to sit at it for how long, at first we played old games like Mario, Dyna Blaster, she liked to play The Sims, also some project similar to Second Life, or maybe that was the game. I played Starcraft 2, Civilization, Heroes of Might and Magic, The Witcher, then around 2008 I got hooked on the Chinese MMORPG Perfect World, I made a lot of friends from different countries there and my first love, it was a girl from Russia from the city of Chelyabinsk, about 3000 km from us, she invited me to her place, we were both 19-20, but I could not admit to her that I was disabled, I was afraid that she would turn away from me, then she found a new job, met a guy there and I just decided to disappear from her life.
Then some kind of epidemic series came, my sister and I were very often and seriously ill with respiratory diseases, here and in Ukraine in 2009 there was an epidemic of swine flu, my sister suffered from pneumonia 10 times in a year, she was a real fighter and never gave up, our attending physician advised us that when we were especially ill, we were given oxygen from an ordinary construction cylinder, she was getting worse, we called an ambulance 4 days in a row, they did not want to help us, I asked the ambulance for an ambu bag for my sister, but they said that they did not have one, my mother and Katya went by ambulance to the intensive care unit and they drove 25 km in almost 2 hours, halfway there they stopped at a gas station to refuel, my mother said that in the ambulance (an old Soviet car that stank terribly of gasoline), and my sister suffocated in my mother’s arms, the ambulance never took her to the intensive care unit, this was on December 26, 2009.
My sister was very cheerful and strong; she was often bullied by her peers, but she never gave up. She always led an active lifestyle, even going to nightclubs.
After these events, I plunged into a long depression that lasted about 4-5 years. My mother became very ill. At 40, she developed arthritis/arthrosis; she literally couldn’t walk due to the stress; her nervous system couldn’t cope. During this whole time, my mother lifted me herself and even injured her back. We began looking for solutions because my mother couldn’t walk on her own, and we still had to lift me, and one of my mother’s friends helped us. She found an old mechanical lift and gave it to us; before that, my mother had lifted me manually for 28 years.
We asked my father, who was seasonally in Moscow, to find a lift, but he complained that he couldn’t find anything. Around 2015, he lost his job completely, and we returned to farming for a few years. Around 2019, my mother’s sister, who lives in France, took him there to work, and around 2020, he bought me my first wheelchair, an Optimus 2. Then he bought me an electric lift from there.
After buying an electric wheelchair, my life changed dramatically. I felt a freedom I had never had before. I literally cried the first time I went outside. I was able to drive about 200-300 meters down the road. I was dizzy, but I was happy. I was no longer tied to the house and my room. Before that, I could only go out into our yard with its awkward slope and stand still, or 2-3 times a year I was taken along bad roads to the park or lake. I started going for daily walks with my mother, and then sometimes on my own. Those were probably the happiest years of my life. We’d walk in the evenings when my mother was finishing her chores. We managed to get her appointed as my social worker through the courts. The state took part of my pension and gave it to my mother as her salary, adding an extra 1,200 lei. One day, my mother had a relapse with her back; she literally couldn’t walk, so I went to the pharmacy to get her some medicine.
We didn’t have the conditions for me to be able to leave the house without any problems. Although we didn’t have high steps, we used a wooden flooring as a ramp, but it quickly fell into disrepair. My mother fell off it one late fall and broke her arm. It was a real tragedy. She couldn’t lift me up or fix me with one arm, but there was no one to ask for help. She lifted me with one hand, through terrible pain, using an electric lift. Then, a year later, I fell off this ramp and almost flipped over. It took superhuman effort for my mother to keep the wheelchair and me on two wheels. After that, we decided to add another room so that there would be no steps at all and I would have a smooth, free exit to the street.
My condition has been rapidly deteriorating over the past 2-3 years. I’ve had several close calls. The first time was a year ago, when I pulled out of my driveway and, since we live in a fairly hilly area, I couldn’t stop, and a truck was following me. I was seriously scared. I couldn’t stop, and the truck was behind me. I managed to pull over to the side of the road, and the wheelchair stopped, hitting rocks. The second time, I was with my mother, but due to the downward slope, my hand pressed the joystick all the way down, and I crashed into a car. There was another time when, again due to a steep slope, I couldn’t stop and crashed into an obstacle on the side of the road. That’s why I started looking for a different electric wheelchair, one with slope adjustment and a gyroscope. My rides on the Meyra Optimus 2 for the last year have been like this: my hand was placed on a homemade joystick, and my mother pushed my elbow from behind to move forward, as I don’t have the strength to do so.
My dog’s name is Bobby, I found him in the park where I often walk, 3 years ago, and I consider our meeting predetermined, I was sometimes very lonely walking alone, and you could say he found me, came up to me and started gnawing on the footrests of my wheelchair, I could not resist and asked several schoolgirls to catch him for me and put him in a backpack at the back of the wheelchair.
As for games, I’ve completed all of The Witcher games, Far Cry 3-4, Dark Souls 3, Resident Evil 3 remake, RDR2 partially, Kingdom Come Delivery partially, Fallout 4 partially, Crusader Kings 2, Xcom, I didn’t like Metro Exodus. I mostly like reading science fiction and fantasy. I used to read the Warhammer 40k series Dan Abnett, Dan Simmons Hyperion, The Terror, and Remarque’s Black Obelisk. The last one I read was Peter Watts’s Blindsight, which is 50% complete. I’m reading less and less because my eyes get tired. I also had memory problems after COVID, so I started playing chess to improve my memory.
As for movies, I love historical costume dramas. I also love sci-fi and documentaries. I watch Netflix series quite often. Usually on various topics, but also something historical. I already mentioned that I’m a bit of a chess fan because it’s good. It stimulates memory. Regarding neural networks, when the first local generative neural networks appeared, like Stable Diffusion and flux, I started studying them. Nothing serious, but it’s something between graphic design and machine learning. I studied LoRA (Low-Rank Adaptation) training. I used to make custom banners, but with the development of neural networks, it became less popular.
I don’t know why, but I often see strong women in this world, while men often suffer from nonsense: they drink, smoke, use drugs, and waste their lives. Sometimes I think I’m the same as them. I often made plans to do something, change my life, start earning money, and I even found work. For about a year and a half, I was an operator at a local transport company, answering calls and managing clients, but with the onset of COVID, they closed. Then neural networks appeared, and I freelanced a little, which also lasted for about 1.5–2 years. I was able to buy a modern computer. But there were also many failures. I tried to learn programming and I liked it, but because I’ve been typing on an on-screen keyboard for many years, my typing finger became inflamed from the sheer amount of writing; it hurt terribly and became crooked, so I gave up.
I would like to study. I liked psychology and law, but these are more like dreams that warm the soul and are not destined to come true. I’m not sure I have enough strength for this (and it seems I’ve forgotten everything I studied 20 years ago).
As for music, I like hard rock, heavy metal, grunge, and alternative metal/rock. I’ve also listened to punk rock, but mostly Russian bands, and sometimes I like to listen to classical music. I also like operatic vocals, but I’m not very knowledgeable about it. For a while, I really liked the band Nightwish, where metal intersects with opera singing.
Regarding what’s happening in the world, it seems to me that we are plunging into the Dark Ages again. There is too much stratification in society, too much injustice, and there is no solution. The rich live in their own world and do not want to change anything. I am afraid of where the world is heading — that it is mired in conflicts, and human rights and freedom of speech are turning into empty words again.