And now for something completely different! Last week we saw some highly technical wizardry. Today I spent some time just cobbling things together with low tech “found materials” in my basement, to minorly improve and modify my powerchair.
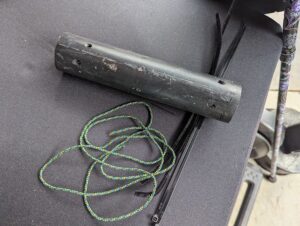
My Whill C2 powerchair needed a cane holder and I had a section of PVC pipe set aside to make one. You can get a $100 fabric cane holder, kind of like a quiver for arrows, from Whill, but I figured why not spend a dollar to make one instead.
Here’s my short length of pipe, with holes drilled into it, ready to attach to the chair frame. I figured I could find somewhere to put it, and got out some cable ties and other material to see what might work best to fasten it on.
First of all, take a look with me at the seat back of the C2. It has a nice aesthetic look to it, curvy, sleek, matching the rest of the chair. It even has double slots on both sides, useful for attaching a cane holder.
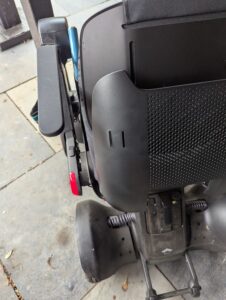
However, I felt that on top of this curved plastic cover, my round length of PVC pipe would stick out further than it needed to, and I also figured taking the cover off could expose a different set of slots in the actual seat back slots. The cover doesn’t do anything functional. It just hides the metal and bolts of the seat back and frame. Off it goes!!!
Here’s the seat back of the C2, naked:
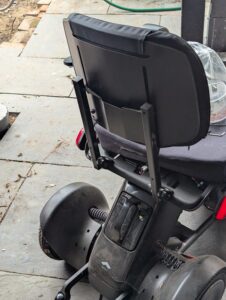
There are four bolts that go through the long slots in seat back and into the frame of the chair, meant to allow you to loosen the bolts and move the seat back up and down to adjust it to the height you like. This is a nice feature of the Whill design! To get the plastic cover off of the frame, I had to completely remove these bolts and the seat back, temporarily.
Already, you can see how this kind of modification goes. You have a simple idea: attach a length of tube to a wheelchair. You then realize you have to take apart more of the chair than you thought you would. Keep going back for more tools, more sizes of bolts, nuts, and washers, and so on.
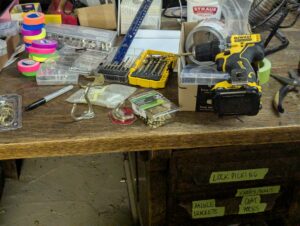
To that end it is good to be extra prepared in your work area. Have a tray or bowl or two ready to hold screws and small parts. Have a sharpie and some tape to label things or even a notebook to take some notes!
It is also great if you have a secret hoard of a million different sizes of screws and bolts and little tools. Saves you having to go to the hardware store and lose all your momentum to finish a project!
Back to our hack!
Maybe I lied a little bit about the uselessness of the plastic cover: It has some little “ears” that stick up maybe half an inch, which are meant to help you hang something on the back of the chair. They aren’t big enough or tall enough to hold a substantial backpack, grocery bags, or anything real, in my opinion. I end up just looping the shoulder straps of my backpack all the way over the entire seat back.
So, as I looked at the slots in the newly naked seat back, I figured I could also add some hooks. Back to my workbench to dig around in the drawer of hooks and brackets. I had several possibilities!
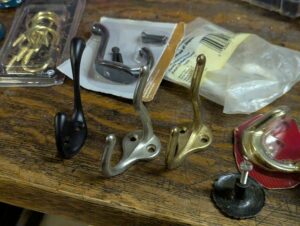
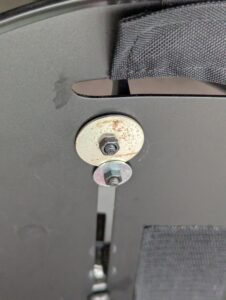
The narrow black hooks seemed like the best fit. They came with screws to attach them to a wall. Since screws would not work well with the wheelchair frame, I had a search through my motley collection of nuts and bolts. It had to be a small bolt thin enough to fit through the hole in the coat hook, not too long so it didn’t end up poking me in the back, and I had to find a washer that would help stop the bolt from falling through the fairly wide slot.
Here is what I ended up with. M4 bolts, with hex socket heads, 15mm long. The washers aren’t quite right and don’t match each other. But they work well enough for now.
I have a note to get better washers and also to get some rubber stuff to shove between the washers and the curved seat back, so that it won’t slip or come undone. (I have good luck going to hardware stores and just asking someone who works there to suggest an option!) Once I have some rubber rings or maybe even just a foam sheet in there, I could also add some vibra-tite or blue loc-tite to the bolt to keep it from coming loose.
As another critical step in this process, I added spare bolts and the right size hex keys to tighten them into my portable toolkit!
Finally I am ready to add my cane holder.
Or am I ?
I looked at the slightly battered piece of black PVC pipe. It will probably get covered with stickers so maybe I don’t care how it looks. But the edges were very rough where, a while back, I used my (glorious) cordless mini-ripsaw to hack a length of pipe off of a much longer piece. I imagined my grocery bags catching and tearing on it, or someone helping me load the chair into a car scraping against the jaggedy edges. A metal file and some sandpaper helped me to smooth down the edges nicely!
Then I used two cable ties through the holes I drilled, to pull it tight to the vertical bar of the seat back frame. It felt like it needed a little extra snugness so I added two black pipe cleaners around the frame and the entire pipe rather than through the holes. Gaffer tape, duct tape, or more cable ties also would have worked fine for this stabilization but I was curious how pipe cleaners would hold up.
Here is the final look. It doesn’t look too bad! It’s at least neat and compact, the hooks are black to match the frame color, my cane fits nicely into the holder, and the hooks will carry my backpack and several grocery bags as well!

I was very happy with my little modification! I even remembered to clean up my workbench to put everything away, since I got out about 100 more things than I had originally intended to.
This should be written up as kind of a recipe rather than this log of my process, but a journal of how I figured out how to do this is also useful, I think!